Flushing a water heater means draining accumulated sediment from the bottom of the tank — and it’s one of the most effective maintenance tasks you can do to extend your heater’s life and keep it running efficiently. In Denver, where water hardness causes mineral scale to build up faster than in softer-water regions, annual flushing is a reasonable target. The process takes about an hour and requires only a garden hose and basic care around hot water. Here’s how to do it correctly.
Why Flushing Matters for Denver Homeowners
Denver’s water supply carries dissolved calcium and magnesium — the minerals that leave spots on your dishes and scale on your showerheads. Inside your water heater tank, those same minerals settle out of the water each time it heats and collect as a layer of sediment on the tank floor. As that layer thickens, it insulates the burner from the water, forcing the heater to run longer cycles to reach temperature. The result is higher energy use, the characteristic popping and rumbling sounds homeowners notice, and a shortened tank lifespan. Flushing removes that accumulated scale before it does real damage.
What You’ll Need
- A garden hose long enough to reach a floor drain, utility sink, or outdoor area
- Work gloves — the water will be hot
- A flathead screwdriver (some drain valves require one)
- A bucket, if you want to catch initial output to check sediment levels before connecting the hose
Step-by-Step Flush Process
Step 1 — Shut off the heat source. For gas water heaters, turn the thermostat dial to the “pilot” position — this prevents the burner from firing while the tank drains, which protects the burner from running dry. Do not shut off the gas supply entirely unless you’re comfortable relighting the pilot. For electric water heaters, turn off the dedicated breaker at your electrical panel. Never drain an electric water heater with the elements still energized — running heating elements dry will burn them out immediately.
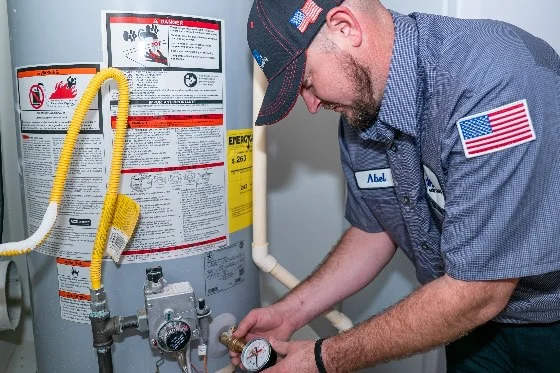
Step 2 — Connect the hose and route it safely. Attach your garden hose to the drain valve at the base of the tank. Route the hose to a floor drain, utility sink, or a location outside where the hot, sediment-laden water won’t damage landscaping or contact people or pets. The water coming out will be very hot — treat it accordingly.
Step 3 — Open a hot water tap. Go to any faucet in the house and open the hot water side. This breaks the vacuum and allows the tank to drain freely. Leave this tap open throughout the process — water sputtering and air coming through is normal as the tank empties.
Step 4 — Open the drain valve. Turn the valve counterclockwise to open it. Water will begin flowing through the hose — expect it to be discolored and possibly carrying visible sediment, especially if the tank hasn’t been flushed recently. Let it drain until the flow slows significantly or stops.
Step 5 — Flush with cold supply water. Briefly open the cold water inlet (this is always open unless you specifically closed it) to agitate and rinse any remaining sediment. Watch the output at the hose end — when it runs clear and sediment-free, you’re done.
Step 6 — Close the drain valve and refill. Close the drain valve, remove the hose, and let the tank refill fully. Keep the hot tap open and watch for steady, air-free flow from it — that signals the tank is full. Then restore the heat source and allow 30 to 60 minutes for the water to reheat before testing.
When the Drain Valve Won’t Cooperate
On tanks that have never been flushed, the plastic drain valve can seize shut or break when you apply torque. If the handle won’t turn, do not force it. A broken drain valve on a pressurized, full tank of hot water is a real hazard. Stop and call a plumber. A licensed plumber can replace the valve safely and complete the flush. This is also the right call if the water never clears after multiple flush cycles — heavy scale accumulation may need a professional descaling approach or may indicate the tank is near the end of its service life.
How Often Should You Flush?
Once a year is the standard recommendation, and it’s especially important in hard-water areas like the Denver metro. If you’ve never flushed your heater and it’s several years old, start now — and consider pairing the flush with an anode rod inspection, which a plumber can do at the same visit. The anode rod sacrificially corrodes to protect the tank lining; once it’s depleted, the tank corrodes directly.
The Done team handles professional water heater maintenance including flushing, anode rod service, and full inspections. If the flush reveals your heater is past its prime, we can walk you through replacement options — including tankless systems that eliminate the sediment problem entirely.